Category Archives: Cooking

Naturally Better: Make Your Own Vanilla Extract

I bake A LOT, just about every weekend. So, I go through a lot of vanilla extract. I kept buying those cute little two ounce bottles of it every month or so. It was really quite expensive. I wondered if I could make my own cheaper and better.

Vanilla extract, real vanilla extract, is just vanilla beans extracted into alcohol. That’s it! Vanilla beans + alcohol + time= vanilla extract. So easy! The neat part is you can vary the taste depending on what alcohol you use. I use bourbon. I think it gives it a really rich warm flavor. You could use rum for a more exotic flavor. Use vodka if you want a more exact, straight vanilla flavor. Use brandy for a … if you like brandy…

The other great part is you can make a HUGE amount of it with a relatively small investment. Currently, I have a 750 ml bottle steeping. I spent less than $35 on the bourbon and vanilla beans. That’s going to make over 25 ounces of vanilla extract or the equivalent of 12 and a half of those little bottles! That has to be savings of well over $25.

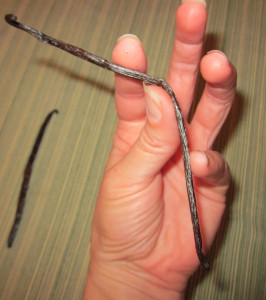
A word on vanilla beans: they should be soft, bendable and very fragrant. If they are hard and dry, you probably are not going to get much out of them.

Fresh vanilla beans bend

Fresh vanilla beans bend

The first time you try it, I would suggest starting with a half-pint of liquor. There is some debate over how many vanilla beans you need but really it depends on your own taste. I think a really easy place to start is half a bean per ounce. So, that is four beans for a half-pint. (Make it five if you want it extra vanilla-ey!)

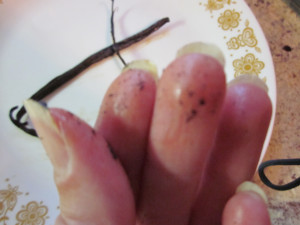
Split the vanilla beans length-wise.

Split beans length-wise.  All the little seeds will be revealed.

Split beans length-wise. All the little seeds will be revealed.

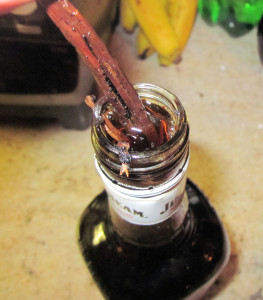
Put them in the bottle.

Beans in bottle

Shake the bottle.

Wait for at least a month before using. Two is better. Give the bottle a shake every once in a while.

Once the extraction process is complete, then you can strain out the beans if you like. I just leave them in there and let them keep steeping.

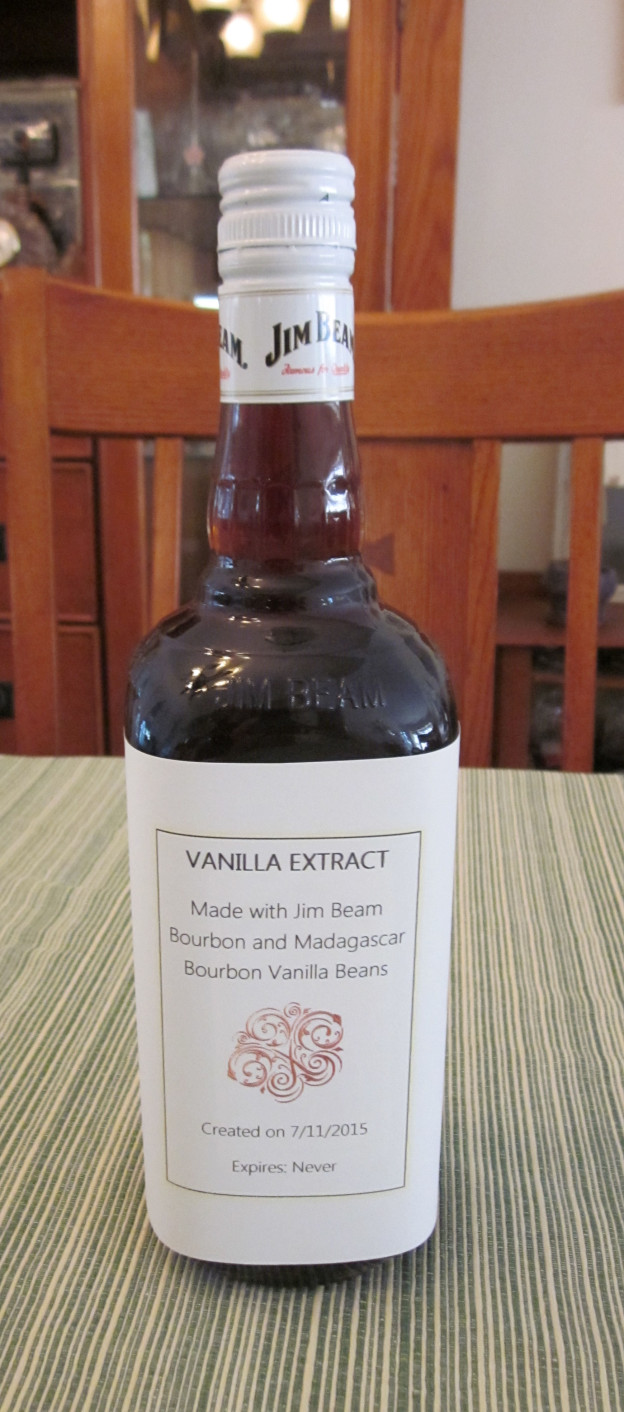
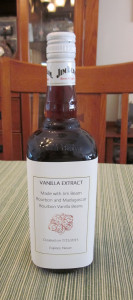
It’s a good idea to re-label your bottle, lest it end up on your bar cart.  (Although, that would probably make for some delish cocktails!)  Also, you can put the date that you created it on or the date it’ll be ready.  By the way, vanilla extract never expires.

Relabeled

Relabeled

Do you make your own vanilla extract already? Would you give DIY vanilla extract a try?  Leave me a reply and let me know.

Many blessings to all,

Cynthia

Please follow me on Twitter.  Also, please LIKE my Facebook Page.

justdragonfly

Natural Way to Start the Day: Summertime Smoothie

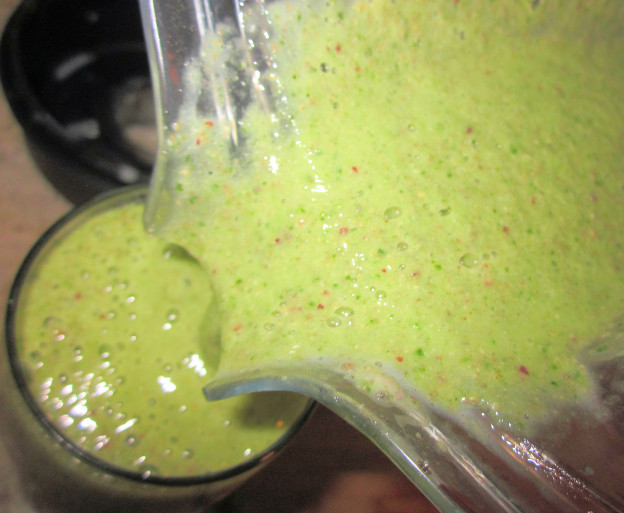
Summer is the season of the green smoothie! You can get all your ingredients fresh from the Farmer’s Market. The best foods for our bodies are the ones that are available in season. Getting fruit and veggies from the Farmer’s market ensures that they were grown locally and that they were picked when ripe.

I start every morning with a green smoothie. (When I didn’t get to make it yesterday. I really REALLY missed it!)  Here is what I have been putting in my blender lately:

Summertime Green Smoothie Recipe

Two big handfuls of Kale

The juice of a quarter slice of lemon

One peach, stone removed but skin intact

One cup of almond milk

One banana

Two tablespoons of Chia Seeds (These are rich in protein and fiber!)

I usually just throw it all in the blender and whirl it up. If I remember I will soak the chia seeds in the almond milk first. (Soaking seeds speeds up the time in which you digest them.) Most of the time, I just toss them in the blender with everything else. They still get the job done!

Another variation on this recipe that I like is to replace the peach with a few slices of melon. I try not to go overboard on the fruit. Although it is healthy, spiking your sugar first thing in the morning might have you crashing soon after you get to work.

Do you drink green smoothies in the morning? What do you put in yours? Please let me know in the comments section. I would love to hear from you.

Many blessings to All,


Cynthia

Please follow me on Twitter.  Also, please LIKE my Facebook Page.
justdragonfly

Peanut Butter Chocolate Chip Muffins

I have been doing a lot of my own baking these days.  There are a lot of advantages: 1) I use only real ingredients, often organic 2) I save money 3) I LOVE baking!  There is somethig so satisfying about putting a bunch of powders and fluids together, adding heat and tada, a completely new creation appears.

I have been noodling in the kitchen long enough that I can wing it.  I came up with something so tasty yesterday, I thought I’d share it with you.

Peanut Butter Chocolate Chip Muffins

Ingredients:

2 Cups Unbleached All Purpose Flour

1 teaspoon baking powder

half teaspoon baking soda

half teaspoon salt

quarter cup organic unbleached sugar

1 mashed up banana

1 teaspoon vanilla extract

quarter cup oil

1 cup of soy milk

one cup chocolate chips (I like to use big dark chocolate chips)

Big ‘ol dollop of peanut butter (approximately a quarter cup)

Mix all the dry ingredients together in a large mixing bowl.  (Use a bowl you love to mix things in.  Love is an important ingredient.)  Add the wet ingredients until just mixed.  Then gently stir in chips.  Swirl in the peanut butter last.

Spoon into a greased muffin tin.

Bake at 375 for approximately 20 minutes.  Your kitchen will smell sooooo good! Allow muffins to cool before handling. Pop them out with a knife and enjoy!

Please follow me on Twitter.  Also, please LIKE my Facebook Page.
justdragonfly

Naturally Veggie: Tortilla Lasagna

I love tortillas and salsa!  However, given my dental issues since I fell in 2013, I have to avoid crunchy, hard food.  I started making what I call Tortilla Lasagna as a way to indulge my love of tortilla chips… all Mexican food really.

Ingredients:

Tomato Sauce

Tortilla chips

Black Beans

Salsa (I added some real grape tomato slices here as well)

Vegan Cheese

Chopped Olives to garnish

Preheat oven to 350.

I am not  going to include measurements because I usually just make it for myself in a loaf pan.  You just layer in the ingredients to fill whatever pan you are using.  (Usually I only put in a layer of each item and then eat the whole pan.)

Put in the oven for twenty minutes and voila!

It’s quick, easy and delish!  Even after my teeth are finished, I will still be enjoying this dish.

Give it a try.  Let me know what you think.

Love and Many Blessings,

Cynthia


justdragonfly


Naturally Veggie: Tater Tot Casserole. Yum!

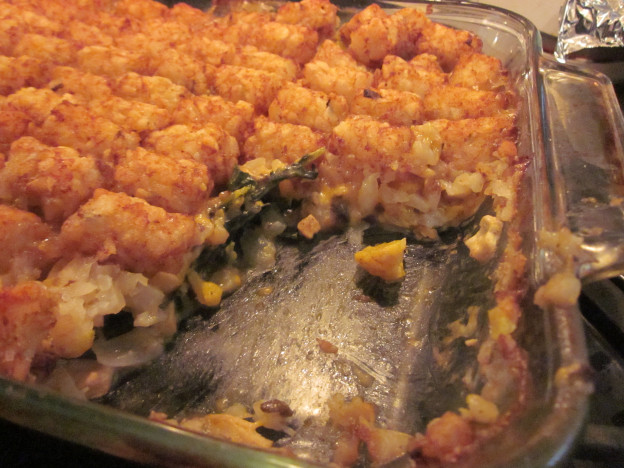
Looking for a Meatless Monday Meal?  How ’bout Veggie Tater Tot Casserole?

My recipe

  1. One Onion
  2. Head of Cauliflower
  3. Fresh Spinach
  4. Package of Firm tofu
  5. Cup of Veggie Broth
  6. Package of Veggie Cheese
  7. Can of Cream of Mushroom (To be honest… might not have been vegan but it was organic.)
  8. Tater Tots Yeah!

Just saute some onions, then add chopped tofu when they start to soften.  I added a little veggie broth when the oil had been absorbed.

Lay it out in a casserole dish. Then layer with fresh or frozen veggies (I used cauliflower and spinach) , add 3/4 cup veggie broth, a can of mushroom soup,  Then veg cheese and top with frozen tater tots. Cover with foil,

I baked for an hour at 350 then put it up to 425 for ten minutes just to crisp up the tots a little.

So good!  I had seconds.  I think you might too.  Enjoy!

Love and Blessings to All,


Cynthia


Please follow me on Twitter.  Also, please LIKE my Facebook Page.
justdragonfly

Lavender Muffin Update!

The lavender muffins turned out beautifully!  They are just sweet enough: a beautiful balance of vanilla and lavender.  The taste is like a little bit of edible springtime.  Yum yum yum!

Want the recipe?

I started out with Lovely Lavender Muffins from Very Hungry Vegans.

I adapted it though because I thought the maple syrup would overpower the lavender.  So, I used about a quarter to a third of a cup of agave nectar instead.  I would have preferred honey but my jar was running low and I need it for my tea tomorrow.  The agave did quite nicely and keeps the recipe strictly plant-based.  I also opted for a heaping tablespoon of coconut oil rather than a full 1/3 cup of oil.  (With all the apple sauce in the recipe, I suspect it may be possible to skip the oil altogether.)  I don’t measure vanilla extract because I love it and one tablespoon would never be enough for me!

Whether you stick to the original or use my adaptations (or your own) I am certain you will find lavender muffins to be delightful.  Added bonus, your house will smell amazing!

Love and Blessings to All,

Cynthia


Please follow me on Twitter.  Also, please LIKE my Facebook Page.
justdragonfly

Brussel Sprouts: A Former Hater finds…Like

I have always despised brussel sprouts.  As a vegetarian, I generally like all vegetables but not brussel sprouts.  I thought they were mean, nasty, little, bitter cabbages and I avoided them like the plague until today.

I’ve been doing research on nutrition that will support me having the best possible outcome from the dental reconstruction I will begin shortly. (I’ll get more into this in a future post.)  So, you can imagine my inner conflict when I discovered that brussel sprouts, those angry little wet balls of green slimy leaves, are loaded with vitamin K, essential to strong bones, and calcium… among many other health benefits.  Dammit!  Now, I was going to have to give those little suckers another try.

So, today with an open heart and mind, I opened a bag of fresh (well, you know, Trader Joe’s fresh) of brussel sprouts.  I dutifully cut off what remained of their little tails and split them in half.  (I learned it was good to split them in half because sometimes little creatures can be found amongst the leaves…ewwwl!)  Then I put them in a bowl full of water with three tablespoons of vinegar for ten minutes to clean them.  I rinsed them off and was ready to roast.

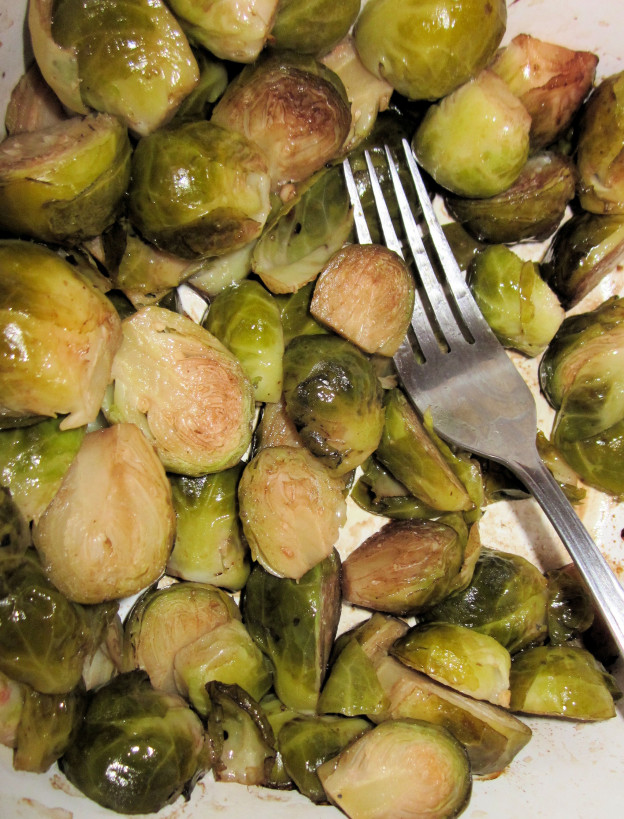
I figured, since I tend to like roasted veggies that, roasting might increase the odds I actually would find them edible.  I added a few tablespoons of balsamic vinegar, olive oil and a sprinkle of salt and pepper.  Then I put the little green guys in the oven for about 25 minutes at 350 degrees.

When I checked on them, I was pleased to find them just starting to turn brown and tender but not slimy.  I cautiously put one in my mouth and began chewing.  While, I would say they definitely were mildly astringent but not at all bitter.  They were quite pleasant.  I couldn’t believe it.  I was actually enjoying brussel sprouts!

So, to any of you veggie avoiders out there (you know who you are!) you may want to give your detested dish another try.  I think prep is key when it comes to certain vegetables.  So, if you don’t like it the way your grandma made it; find a new recipe; mix it up; invent your own!  It might improve your health and make your world a little more interesting.

Love and blessings to all.

Cynthia

Please follow me on Twitter.  Also, please LIKE my Facebook Page.
justdragonfly