Tag Archives: homemade

Want to Save Money, Lose weight and Be Healthier? Eat Cabbage!

Until recently, whenever I thought about cabbage I would remember the unwelcome smell that permeated the hallway of my grandmother’s building in Far Rockaway, NY. It would make my nose wrinkle and I couldn’t wait to get into her apartment which always seemed to smell like fresh baked dinner rolls or something equally delicious.

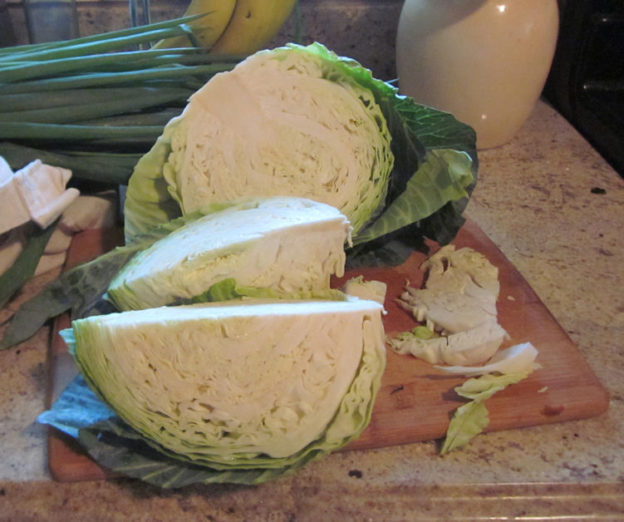
So, I quite surprised myself when I picked up a head of cabbage at the farmer’s market.  I did it for two reasons: 1. I know how nutritious it is.  2.  It was only $2.  WIN, WIN!

I pondered what to do with it on the way home.  Then I surprised myself again by slapping the steering wheel and declaring out loud, “I am going to make sauerkraut!”  I have no idea where the thought came from since I never made it before and quite frankly… I never even really thought about sauerkraut being comprised of cabbage.  The same goes for coleslaw (which I also decided to make.)

How hard could it be?  It turns out, not hard at all.  It became clear after some quick research that sauerkraut is merely cabbage+salt+time.  I chopped the cabbage as thin as I could by hand, threw in a few tablespoons of kosher salt and began to massage it.  I found myself wondering how many of my German ancestors must have done the very thing I was doing at that moment.  It felt so natural working the salt into the cabbage until the juices flowed out.  After about 10 minutes, I decided I created enough of a brine to jar it up.  You want there to be enough liquid to fully submerge the kraut.  I used an onion* half to weigh it down in the jar.  After that, I topped the jar with a coffee filter and rubber band.  I found this set-up very effective for keeping the oxygen out while allowing the carbon dioxide to escape.  Then I set the jar in a dark cabinet in the basement, the only place that might come close to maintaining the ideal temperature range of 65 to 75 degrees.

How does this make sauerkraut?  The short answer is that cabbage naturally carries bacteria like lactobacilli which helps kick off lactic acid fermentation.  The salt preserves the cabbage to keep it from rotting while fermentation takes place.  There is a lot of debate about the proper amount of time to allow sauerkraut to ferment, anywhere from three days to six months.  I found the most consensus that around three weeks is enough time.  The idea is to allow the sauerkraut to ferment long enough to produce a goodly amount of probiotic bacteria. Then after that it’s just about taste.

However, if you are like me and you can’t wait that long or if the average temp is above 75 degrees then two weeks is long enough.  Also, keep in mind, the sauerkraut will continue to ferment in the fridge.  It will just happen much more slowly below 65 degrees.

BBQ beans on toast with tomato, olives, homemade kraut and a pickle... what more could you ask for?

BBQ beans on toast with tomato, olives, homemade kraut and a pickle… what more could you ask for?

I have to tell you that homemade sauerkraut is DELICIOUS!  It is so much better than store-bought. I am not sure I could eat the canned stuff ever again.  Give it a try if you like sauerkraut.  You have nothing to lose.  I paid two dollars for a head of cabbage at the farmer’s market.  (I noticed they are $1.29 at the supermarket.)  That one head netted me 16 ounces of sauerkraut and eight cups of coleslaw.  I call that VERY budget-friendly!

I will get more into the nutritional and weight loss benefits of cabbage in my next post, as well as share the coleslaw recipe I concocted.

Many Blessings,

Cynthia

*I got the onion as a weight idea from the Dr Axe website: https://draxe.com/recipe/sauerkraut-recipe/

Please follow me on Twitter.  Also, please LIKE my Facebook Page.

justdragonfly

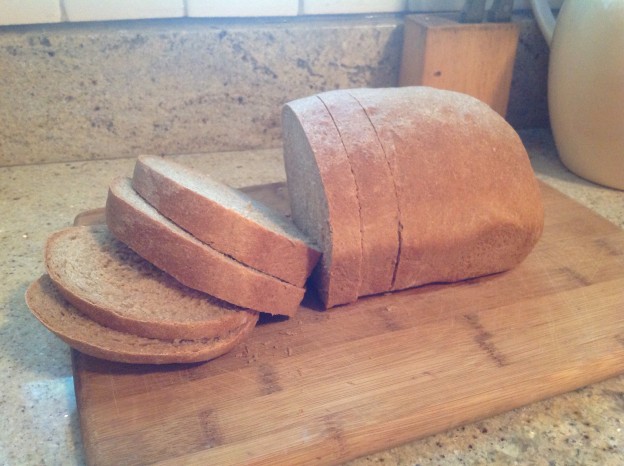
Naturally Homemade: Make Your Own Bread

There was no bread in the house this morning. I was going to run out and pick some up but then I remembered, I can make my own. I am off from work and had stuff to do at home; so, why not?

I started making my own bread last winter. I used to be intimidated by using yeast. I heard horror stories from people about how their breads and pastries never rose. Then I found this really easy recipe on holycowvegan.net and decided to give it a go:

Fast Whole-Wheat Bread

Author: Holy Cow! Vegan Recipes

Ingredients

  • 1 cup whole-wheat flour
  • 2 cups bread flour
  • 2¼ tsp (1 package) active dry yeast
  • 1 tbsp sugar
  • 1 tsp salt
  • 1 cup warm water (not hot– you will kill the yeast)
  • 2 tbsp extra virgin olive oil

Instructions

  1. Place 1 cup of the bread flour, the whole-wheat flour, yeast, sugar and salt in a large bowl or in the bowl of a stand mixer. Whisk to mix together.
  2. Add the water and the olive oil and mix. Add more of the bread flour if needed. How much flour you will need, will depend on where you live and what the weather’s like. I made this bread on a rainy day in Washington and I needed nearly the whole cup. If you live in a dryer region you might need less.
  3. Knead the dough for 10 minutes by hand or with your dough hook set to low speed.  You should now have a smooth, pliable ball of dough that’s not at all sticky.
  4. Place the dough ball in an oiled bowl, turning over once to coat the top with oil.
  5. Cover loosely with plastic wrap or a kitchen towel and set aside for 30-45 minutes or until the dough has doubled in size.
  6. Remove the risen dough from the bowl and punch it well to deflate all the gases. Using a rolling pin, roll out the dough into a triangle about 10 inches long. Now roll the dough toward yourself and make a cylinder, tucking down the seams and pinching them in so you have a smooth loaf.
  7. Place the dough in a standard loaf pan, seam side down (most loaf pans are 9 X 4½ or 10 X 5 inches)
  8. Cover loosely with oiled plastic wrap and let the bread rise in a warm place about 30-45 minutes or until the loaf has risen and domed over the top of the pan.
  9. Preheat the oven to 450 degrees Fahrenheit.
  10. Place the loaf in the oven and bake for 10 minutes. Then lower the heat to 350 degrees and bake another 30 minutes.
  11. Remove the loaf pan to a rack and let it stand until the bread is cool enough to handle. Remove the bread from the pan by loosening the sides with your fingers or a spatula. Place on a rack until it has cooled through.
  12. Slice. Eat.

I have been making it for quite a while and have since made some of my own alterations. Instead of adding more bread flour during the mixing stage, I add the whole wheat flour. So, usually I do 2 cups of whole wheat flour and one cup bread flour. I pre-heat the oven to 425 degrees but I turn it down to 350 right before I put the bread in. The crust is slightly softer that way and better for making sandwiches in my opinion.

Making your own bread is fabulous when you have the time. The benefits are numerous. You can control the ingredients. There are no preservatives. It’s always fresh and delicious. I really love the self-sufficiency of making my own bread.  I am being creative, rather than just consuming. I am not reliant on a store to provide for me.  By far though, my favorite part is the smell! Oh my goodness, your house will smell so so so wonderful. Your nose will be very happy!

Do you ever make your own bread? Are you willing to give it a try? Please leave me a reply in the comments section. I would love to hear from you.

Many blessings,

Cynthia

Please follow me on Twitter.  Also, please LIKE my Facebook Page.
justdragonfly

Naturally Crafty: Upcycled Cards and Gift Tags

Ever go to the card store and find yourself thinking,”Man, cards are really expensive!?” Ever go to the craft store and find yourself thinking, “Man, paper is really expensive!?” Yes? Excellent! I think you are going to like this upcycled solution.

tissue boxes

I started noticing some really nice designs on tissue boxes after watching a few of Jennibellie’s videos on YouTube.  Definitely, check her channel out for inspiration.  She creates truly beautiful projects and often incorporates pre-used materials into her designs.

I picked up a few punches from Michael’s and began making some creations of my own (which I would have photographed more of if I had known I was going to write this post. )  Punches are a good investment.  They save you time, as well as wear and tear on your scissors… and your hands!

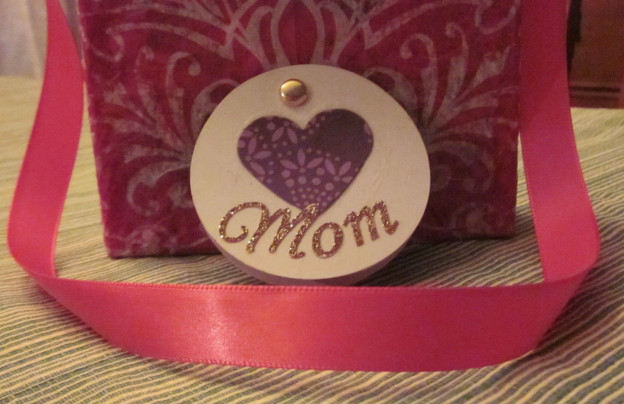
tissue hearts

It’s a lot of fun making your own cards because they can be as simple or complex as you want or have time to make.  You can add hinges made from ribbon or brads.  You can also personalize them to suit your gift recipient by adding their name, embellishments and using their favorite colors.  You’re only limited by your imagination!

Use what you already have whenever you can!

Use what you already have whenever you can!

Once you start doing these types of upcycled projects, you develop an eagle for materials that can be made over like these old name tags from work.  Why not? The card stock is good quality.  They would only end up in the trash.  Why not flip them over and give them a second life?

punched out name

Before you know it, you’ve created a pretty little, thoughtful gift decoration and it cost you practically nothing!  You didn’t have to go to a store.  You got away from electronics for a little while.  You have exercised your creative muscles.  You have made choices that are kinder to Mama Earth.

Heart pearlmonogram pearl

Do you make your own cards and gift tags? Leave me a reply in the comments section and let me know.  I would love to hear from you.

Many blessings to all,

Cynthia

Please follow me on Twitter.  Also, please LIKE my Facebook Page.
justdragonfly


Naturally Eco-conscious: Upcycle that box!

May I ask you a personal question?  When you empty a box like this:

Finish Box


What do you do with it?  Do you throw it away?  Do you recycle it?  Would you like to know what I’m going to do with this one?  I am going to upcyle it into a mailer.  It’s so easy!

1. I open the bottom up:

open bottom

2. Then I gently open this inside seam:

inside seam

3. Then I am left with:

open flat

4.  Now, I flip it around and re-join the seam:

brighter join edges


5. Tape the seam closed with packing tape.  (Make sure you press it into the tape really thoroughly.)

Secure Edge with tape


6. Tuck in the bottom flaps and tape those with packing tape as well.

Finished Box


Voila!  A cute little, free mailer box is born.  I wasn’t ready to put the item in yet.  So, I just used the orginal tab closure on the box.  Of course, when It is ready to go, I will tape the top down as well.  You can write your adress right on the box with a permanent marker or use a label.  I saved money and re-used something that may have just gotten tossed.

Do you upcycle the packages that your household items come in?  Do you think you might try it?  Please leave me a reply in the comments section.  I would love to hear from you.

Many blessings to all,


Cynthia

Please follow me on Twitter.  Also, please LIKE my Facebook Page.

justdragonfly