Category Archives: DIY

Natural Beauty DIY: Better than Store-bought Facial Exfoliant

Most people know by now that commercial facial exfoliants with those little plastic micro beads are bad for the environment and have looked for alternatives.  Thank Goodness!

However, I don’t understand why people are willing to still buy products, containing other harmful ingredients, in packaging (that may or not be recyclable) and throw down a huge chunk of change to do it.  I just did a quick search and saw a dozen or so facial exfoliants, ranging in price from $5 to $50.  My facial exfoliant is all natural, only has two ingredients and costs practically nothing.  You can make it right now.

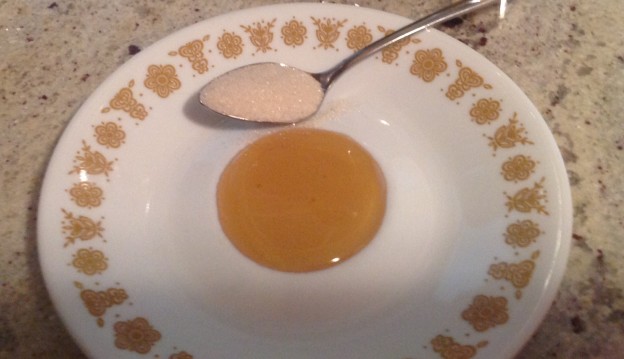
Honey-Sugar Facial Exfoliant

Pour approximately a tablespoon of honey onto a dish or in a small bowl.  Add a teaspoon of sugar. Mix them together.  Apply to damp skin in gentle circular motions with your fingertips.  Avoid your eye area.  (If any gets in your mouth, eat it!)  Rinse with warm water.  Voila! Beautiful smooth skin!

Sometimes, we seem to consume for no other reason than …just because.  Our inner child is lured by a shiny new package (destined to crowd landfills and pollute our oceans.)   We are looking for a quick fix to assuage our fears and insecurities.  So we buy something that we not only don’t need but may cause us harm either through artificial ingredients or by befouling Mama Earth.  Let’s top the madness; shall we?  Let’s take care of ourselves by being creative instead of blindly consuming.

How do exfoliate your skin?  Do you DIY your beauty products?  Leave me a reply.  I would love to hear from you.

Many blessings,

Cynthia

Please follow me on Twitter.  Also, please LIKE my Facebook Page.

justdragonfly

Naturally Crafty: Upcycled Cards and Gift Tags

Ever go to the card store and find yourself thinking,”Man, cards are really expensive!?” Ever go to the craft store and find yourself thinking, “Man, paper is really expensive!?” Yes? Excellent! I think you are going to like this upcycled solution.

tissue boxes

I started noticing some really nice designs on tissue boxes after watching a few of Jennibellie’s videos on YouTube.  Definitely, check her channel out for inspiration.  She creates truly beautiful projects and often incorporates pre-used materials into her designs.

I picked up a few punches from Michael’s and began making some creations of my own (which I would have photographed more of if I had known I was going to write this post. )  Punches are a good investment.  They save you time, as well as wear and tear on your scissors… and your hands!

tissue hearts

It’s a lot of fun making your own cards because they can be as simple or complex as you want or have time to make.  You can add hinges made from ribbon or brads.  You can also personalize them to suit your gift recipient by adding their name, embellishments and using their favorite colors.  You’re only limited by your imagination!

Use what you already have whenever you can!

Use what you already have whenever you can!

Once you start doing these types of upcycled projects, you develop an eagle for materials that can be made over like these old name tags from work.  Why not? The card stock is good quality.  They would only end up in the trash.  Why not flip them over and give them a second life?

punched out name

Before you know it, you’ve created a pretty little, thoughtful gift decoration and it cost you practically nothing!  You didn’t have to go to a store.  You got away from electronics for a little while.  You have exercised your creative muscles.  You have made choices that are kinder to Mama Earth.

Heart pearlmonogram pearl

Do you make your own cards and gift tags? Leave me a reply in the comments section and let me know.  I would love to hear from you.

Many blessings to all,

Cynthia

Please follow me on Twitter.  Also, please LIKE my Facebook Page.

justdragonfly


Natural Lady: DIY Make-up Remover and Reusable Rounds

It took me a very long time to find an eye make-up remover that I liked.  A lot of them would sting my eyes or leave my skin chafed.  I found I really like the make-up remover wipes from Trader Joe’s but they were quite pricey. There were only 20 in a pack, requiring me to buy 2 a month.  All that plastic packaging and disposable material made me feel a little guilty.  So, I decided to try to make my own.

I culled through dozens of Do-it-yourself recipes on the internet.  They were wildly disparate and contradictory at times but three ingredients kept coming up over and over: witch hazel, water and some kind of oil.  Of course, I could find little consensus on how much to pour of each in order to make a bottle.  So, I decided not to use a bottle at all.

reusable rounds

I use a reusable round (mine are made out of bamboo and are really more oblong) and I put a drop of jojoba oil on it, followed by a drop of witch hazel and then I spritz it with rose water.  And voila! It works great and doesn’t sting.

Effectiveness is only one benefit.  There are others. I like keeping all these ingredients separate because I use them all separately as well.  By combining them as needed, on the spot, I am less likely to run out of anything and not have it available to use for another purpose.  Oh my goodness, the money you save!  I used to spend between around $10 a month on those wipes.  I have had that bottle of witch hazel for years.  Jojoba lasts a really long time too because you need to use so little of it.  The rose water I go through fairly quickly but that’s only because I like to spray all over my body from head to toe.

Do you think you will give it a try?  Do you have your own formula?  Leave me a reply in the comments section.

Many blessings,

Cynthia

Please follow me on Twitter.  Also, please LIKE my Facebook Page.

justdragonfly