Category Archives: Naturally Delicious

Monday Mocktail Recipe: Tom’s a Virgin Collins Tonic

Just a quick post to share my mocktail recipe with you.

Tom’s a Virgin Collins Tonic 

  1. Fill your glass with ice
  2. Pour Tom Collins Mix- about a third to half the glass
  3. Add a dash of Aromatic Bitters
  4. Fill the rest of the way with Tonic
  5. Stir
  6. Add lemon wedge (optional)


Enjoy! It is lighter on the liver and your wallet than a regular cocktail. It’s the perfect way to celebrate surviving Monday.

Delish Healthy Chocolate Chip Coconut Walnut Cookies

I like cookies! They are the perfect treat, delicious and portable. The problem I was running into was that I was really trying to stick to a Whole Foods diet. Also, I find that even though I love cookies; ones made with white flour and sugar don’t always sit so well in my belly. It looked liked my cookie days were numbered until I came across this Superfood Chocolate Chip Cookie recipe on The Whole Food Plant-based Cooking show’s channel on YouTube.

I was inspired by that recipe when I came up with this one:

Healthy Chocolate Chip Coconut Walnut Cookies

Dry Ingredients:

1 cup Glutenfree Oats (ground into flour)

1 cup Walnuts (ground or chopped very fine- think bread crumbs, as opposed  to flour)

Half cup Flaxseed (ground)

Half Cup Chocolate Chips (You can use vegan chips for fully vegan cookies. Use stevia sweetened chips if you want to avoid processed sugar altogether.)

Half Cup unsweetened Coconut Shreds or Flakes

Wet Ingredients:

Half cup Peanut butter

5 pitted Dates

Half Cup Soy or Nut Milk

1 Teaspoon Vanilla Extract

1 Ripe Banana

Directions

Preheat oven to 350 degrees

Line two cookie sheets with parchment paper or a silicone mat.

Combine the oats, ground flaxseed and walnuts in a large bowl and set aside. Whirl up all the wet ingredients in a blender or food processor and then combine with the dry ingredients. Fold in your chocolate chips and coconut flakes.

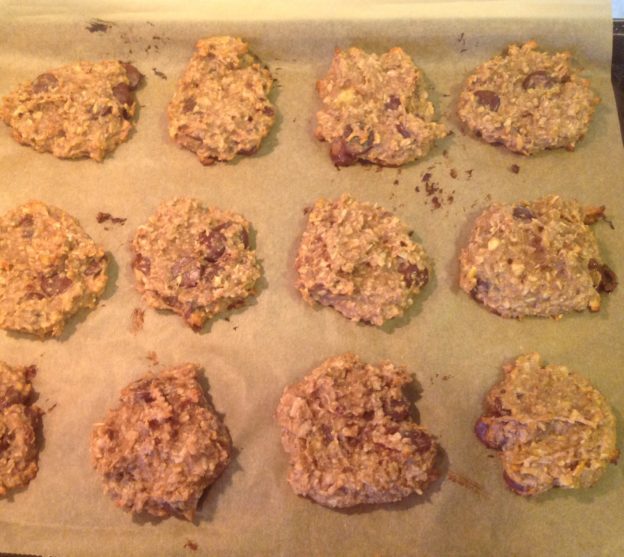
These cookies do not spread when you bake them because there is no baking powder in them. So, whatever they look like when they hit the pan is what they will look like when they are done. Sometimes, I just drop spoonfuls and flatten them with the backside of the spoon. I also like to wet my hands with a little water and make balls. Then I flatten them with the palm of my hand for a smoother cookie. Depends on my mood!

Put the pans in the oven and bake for 10-15 minutes. Watch them. They brown up quickly. Mine are usually done in 10. Yours might be closer to 20, depending on your oven. Let cool and enjoy.

I usually get 18-20 decent sized cookies out of this recipe.

I hope you enjoy this recipe.  Let me know what you think or ask any questions by leaving a comment.

Time to Get this Garden Started!

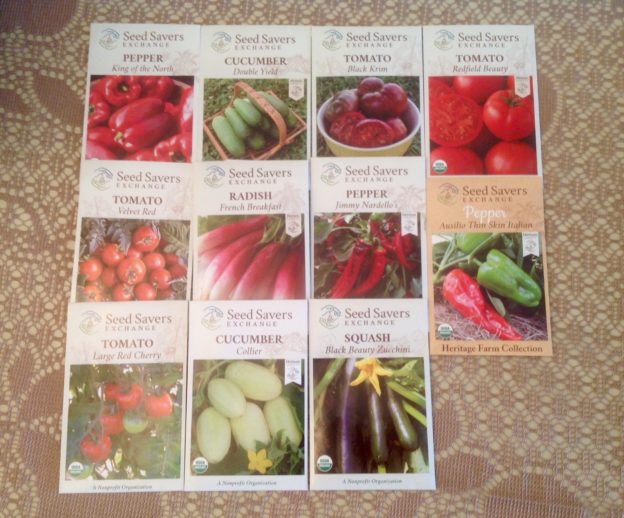
It’s that time again!  One of my favorite things about gardening is watching seeds turn into plants. I am really excited about this year’s seeds because I purchased them from Seed Savers Exchange.

Seed Savers was founded by Diane Ott Whealy and Ken Whealy in 1975.  The mission of this nonprofit organization is to save and share seeds in order to preserve biodiversity for generations to come. They maintain a collection of more than 20,000 heirloom and open-pollinated vegetable, herb, and plant varieties, including over 1,000 varieties of heritage apple trees.  Their collection includes many organic seeds.

I am happy to support an organization with such a great purpose.  I have to admit though, I am even more excited about seeing what comes out of these seeds!  My tomato plants this year have names like Velvet Red and Black Krim! The peppers are Jimmy Nardello’s and King of The North. How cool is that?

Check out this description for Redfield Beauty Tomatoes: “Historic Variety introduced circa 1889 by H.G. Hastings & Co. of Interlachen, Florida. Flattened pink 3″ inch fruits with excellent full flavor.” When was the last time you ate a tomato from the Supermarket that matched that description? Never.

I think that one of the most marvelous things about gardening is the opportunity to discover something new (and delicious!) right in your own yard. There is a romance to gardening. You nurture these plants along on the promise of the rewards to come when they bear fruit.  The prize you end up with is largely determined by the seeds you have when you begin… like all great romances!

Are you starting your garden from seeds? Have you used Seed Savers Exchange? Please leave me a comment. I would love to hear from you.


Meet Miles The Compost Pile!

I have been feeling a little guilty ever since I put up this post, Naturally Resourceful: Getting Scrappy with Vegetables! I mentioned in that post that I was too time-crunched to have a compost heap even though it would be great for my plants and the environment.

Nothing has changed schedule-wise for me since then.  However, my passion for gardening is now completely unhinged.  (It gets me through the day, people!)   I found I was spending an enormous amount of money on compost which is so riduculous considering I was, guiltily, throwing away things all the time that can be composted.  So, I decided to save money, myself from guilt and, hopefully a little of the environment by starting a compost bin.

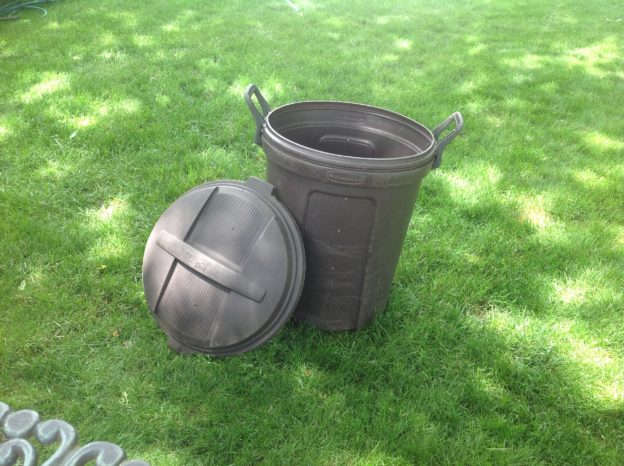
I decided to use this garbage pail because it has a lid and I want to keep creatures out of my bin.  I burned holes in the sides:

And the lid:

With a hot glue gun.  I do not endorse this method because melting plastic never seems like a great idea.  However, my cordless drill wasn’t charged (as usual) and I really wanted to get it done.  I waited until I could no longer smell melted plastic and then gave the can a good swabbing before I started to add compost ingredients.

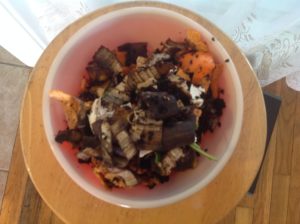
There are so many good resources for what to put in compost and even more importantly, what not to, like Jeff Yeager’s Rotten Luv, I am not going to go into too much detail.  Basically, you want a 2:1 ratio of brown matter to green matter.  I used newspaper shreds for brown matter.  (I figured The NY Times was appropriate for a compost heap named Miles) and for the green matter, I put in coffee grounds, eggshells (No, I didn’t eat the eggs!), plant stems, veggie and fruit peels.

Yum!

I layered the ingredients and gave it a stir.  And that’s it.  I’ll keep adding the ingredients in that 2:1 ratio, and keep stirring it up.  Mostly,  I can just let nature turn it into Black Gold for me.  There are more significant holes in the bottom of the can.  I placed it directly on dirt in the hopes that some worms will find their way in and take up residence, further enriching Miles with their castings.

Why did I name my compost heap?  Jeff Yeager named his Gomer.  I thought it was funny.  So, I decided mine needed to be named too.  So, Miles the Pile was born yesterday May 27, 2017.  I am looking forward to seeing him and my garden grow!

Many blessings,

Cynthia

Seeds Update

There is some good news and not so good news.

Bad news first,  the indoor herb seedlings didn’t make it.  I suspect I didn’t get the peat pots wet enough to start and the sides needed to be covered better with the plastic.  I’ll direct sow them again outside.  I think they will be fine.  I’ll just need to wait a little longer to harvest them.

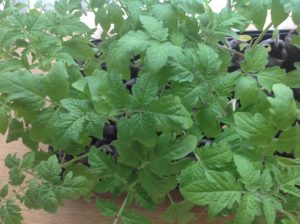
Now for the good news!  The tomato plants are doing great.  So great in fact, I needed to find homes for them.  Several people have said they will be happy to adopt the little leafy guys once they are hardened off and can live outside.  They should be ready in about two weeks.

So, tell me how is your garden growing?

Many  blessings,

Cynthia

The Day After Soup

Let me apologize for the somewhat dramatic and still somehow vague title of this post. I just couldn’t think of anything else…

I went out to eat last night. The Italian food I had was quite delicious and I didn’t overindulge -I didn’t even have bread or wine- but I am having the same problem I always do the day after I eat out, salt and oil overload! Even vegetarians can’t escape the liberal generous mammoth use of salt at restaurants. I am just not used to it and feel a bit off today.

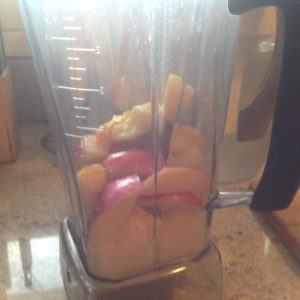
My first attempt to rebalance was to make a large smoothie:

img_0648

An all fruit smoothie has a lot of natural sugar in it but I am not sweating that because it is packed with natural fiber, vitamins, micronutrients and a high water content … which I need right now.

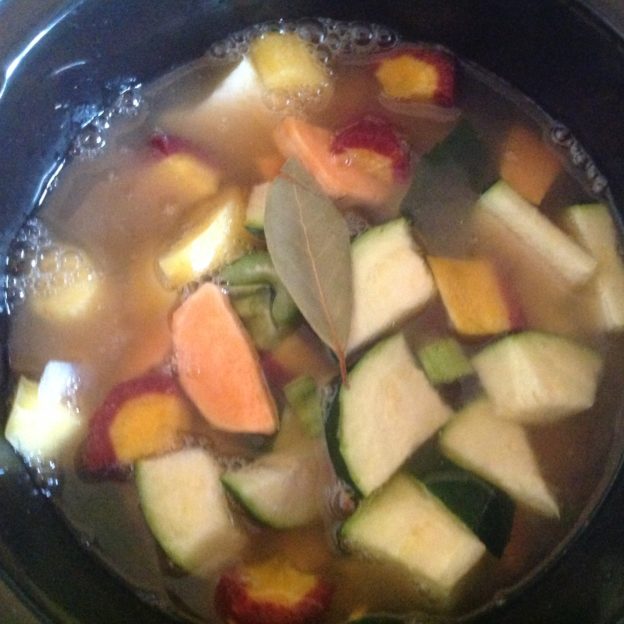
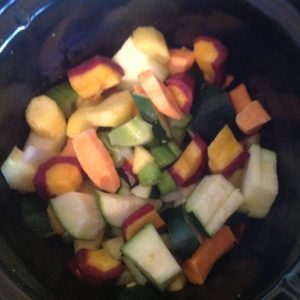
My next order of business was to start up a nourishing vegetable soup:

img_0652

Making a veggie soup once a week is one of the easiest ways to improve your health. You don’t even need a recipe. Chop up a few cups of colorful vegetables, throw them in a pot and cover them with broth or water, add spices, add heat and wait. I like to throw mine in my little crockpot. Heat on high and it’s ready in time for lunch, on low for dinner. Add pre-cooked beans and you have a complete meal. (I would suggest waiting until the last 20 minutes before adding any leafy greens to avoid over cooking.)

So, there are two of my picks to stay healthy during the holidays.  How do you stay in balance this time of year?

Many blessings,

Cynthia

Please follow me on Twitter. Also, please LIKE my Facebook Page.

justdragonfly

Quick (Mostly Healthy) Tea Cookie

I was perusing YouTube the other day when I came across a quick and easy tea cookie recipe from Mary Harris on her Sprout and Blossom channel.  I thought, “Ooooo, tea cookie!  That sounds lovely and comforting.  I have to try that this weekend,” So, I did.

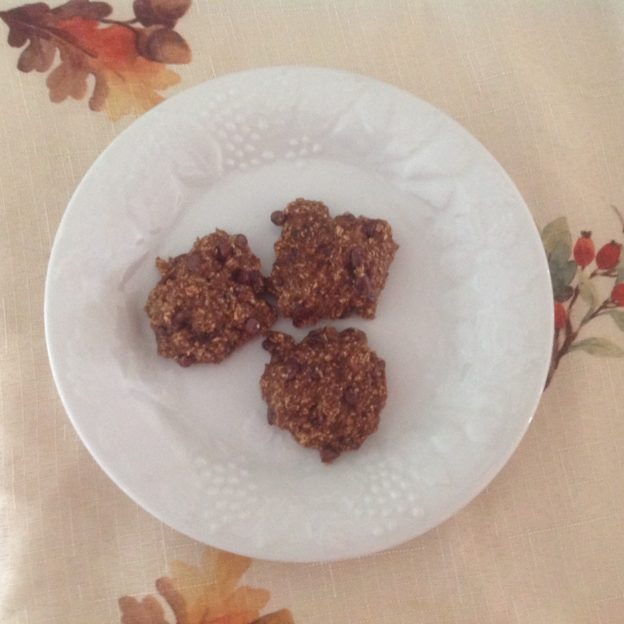
Two main ingredients: banana and oats, what could be simpler?  Mary’s recipe is quite healthy, as well as quick and easy, but I wanted to do the cocoa, peppermint variation.  I was concerned that the cocoa might be a little bitter with only a banana as sweetener.  So, I added a little sugar.

Here’s my variation on the Sprout and Blossom Three Ingredient Recipe:

One cup rolled oats (blended into a flour consistency)

Two small to regular mashed bananas

One teaspoon vanilla extract

One level tablespoon of cocoa powder

Two tablespoons of organic cane sugar

About 3 drops of peppermint extract

About a quarter cup of mini chocolate chips

Preheat oven to 350 degrees.  Mix everything together but add the chips last.  Drop teaspoons of the batter on a lined baking sheet.  Bake for approximately 20 minutes.  (Keep an eye and nose on them, as baking times tend to vary depending on your oven.). I got a dozen cookies out of this mix.

Enjoy!

Many blessings,

Cynthia

Please follow me on Twitter. Also, please LIKE my Facebook Page.

justdragonfly

Want to Save Money, Lose weight and Be Healthier? Eat Cabbage!

Until recently, whenever I thought about cabbage I would remember the unwelcome smell that permeated the hallway of my grandmother’s building in Far Rockaway, NY. It would make my nose wrinkle and I couldn’t wait to get into her apartment which always seemed to smell like fresh baked dinner rolls or something equally delicious.

So, I quite surprised myself when I picked up a head of cabbage at the farmer’s market.  I did it for two reasons: 1. I know how nutritious it is.  2.  It was only $2.  WIN, WIN!

I pondered what to do with it on the way home.  Then I surprised myself again by slapping the steering wheel and declaring out loud, “I am going to make sauerkraut!”  I have no idea where the thought came from since I never made it before and quite frankly… I never even really thought about sauerkraut being comprised of cabbage.  The same goes for coleslaw (which I also decided to make.)

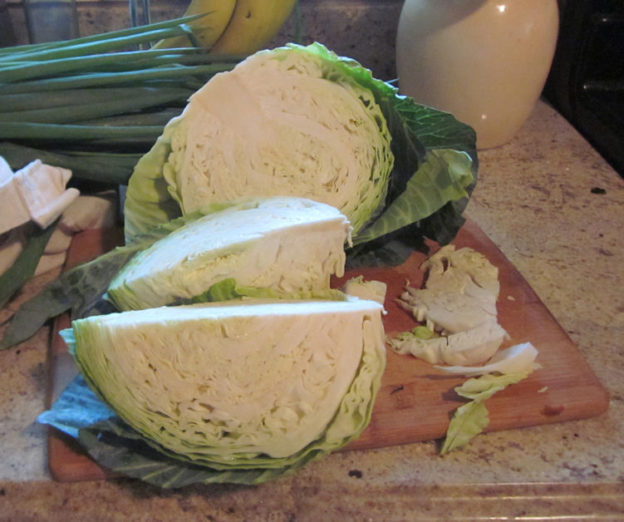
How hard could it be?  It turns out, not hard at all.  It became clear after some quick research that sauerkraut is merely cabbage+salt+time.  I chopped the cabbage as thin as I could by hand, threw in a few tablespoons of kosher salt and began to massage it.  I found myself wondering how many of my German ancestors must have done the very thing I was doing at that moment.  It felt so natural working the salt into the cabbage until the juices flowed out.  After about 10 minutes, I decided I created enough of a brine to jar it up.  You want there to be enough liquid to fully submerge the kraut.  I used an onion* half to weigh it down in the jar.  After that, I topped the jar with a coffee filter and rubber band.  I found this set-up very effective for keeping the oxygen out while allowing the carbon dioxide to escape.  Then I set the jar in a dark cabinet in the basement, the only place that might come close to maintaining the ideal temperature range of 65 to 75 degrees.

How does this make sauerkraut?  The short answer is that cabbage naturally carries bacteria like lactobacilli which helps kick off lactic acid fermentation.  The salt preserves the cabbage to keep it from rotting while fermentation takes place.  There is a lot of debate about the proper amount of time to allow sauerkraut to ferment, anywhere from three days to six months.  I found the most consensus that around three weeks is enough time.  The idea is to allow the sauerkraut to ferment long enough to produce a goodly amount of probiotic bacteria. Then after that it’s just about taste.

However, if you are like me and you can’t wait that long or if the average temp is above 75 degrees then two weeks is long enough.  Also, keep in mind, the sauerkraut will continue to ferment in the fridge.  It will just happen much more slowly below 65 degrees.
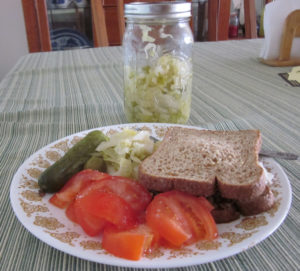
BBQ beans on toast with tomato, olives, homemade kraut and a pickle... what more could you ask for?

BBQ beans on toast with tomato, olives, homemade kraut and a pickle… what more could you ask for?

I have to tell you that homemade sauerkraut is DELICIOUS!  It is so much better than store-bought. I am not sure I could eat the canned stuff ever again.  Give it a try if you like sauerkraut.  You have nothing to lose.  I paid two dollars for a head of cabbage at the farmer’s market.  (I noticed they are $1.29 at the supermarket.)  That one head netted me 16 ounces of sauerkraut and eight cups of coleslaw.  I call that VERY budget-friendly!

I will get more into the nutritional and weight loss benefits of cabbage in my next post, as well as share the coleslaw recipe I concocted.

Many Blessings,

Cynthia

*I got the onion as a weight idea from the Dr Axe website: https://draxe.com/recipe/sauerkraut-recipe/

Please follow me on Twitter.  Also, please LIKE my Facebook Page.

justdragonfly

Homemade Tahini and My New Favorite Sandwich

I use A LOT of tahini.  I need it for hummus, salad dressing, sauces and as a spread for my new favorite sandwich (that I came up with during a moment of divine inspiration.  Recipe below.)  The problem is, tahini is expensive!  The supermarket brand, which I don’t love, is $7 a can.  Once Again, my favorite brand, is $10 a jar.  Yikes!

Clearly, I needed to learn how to make my own.  The good news is that is EASY, delish and SO MUCH CHEAPER.  I found a recipe on Kimberly Killegrew’s  The Daring Gourmet website.  All you need are sesame seeds, a little oil and a food processor or blender.  I ordered a five pound bag of hulled sesame seeds… (as I mentioned I use A LOT of tahini.)  You toast the seeds until they are golden brown; let ’em cool, toss ’em in the food processor with a little olive oil and that’s it!  One thing I did do differently than Kimberly was toast the sesame seeds on a parchment-lined cookie sheet in the oven, rather than in a skillet on the stove top.

Now for the sandwich!  I invented this recipe while I was rushing around making lunch one morning,  When you are a strict vegetarian and short on time, you need to get a little creative when it comes to lunch sometimes.  You will need two slices of bread. I prefer rye.  Spread the tahini on both slices.  Drizzle Sriracha sauce over the tahini.  Drizzle honey over the sriracha sauce.  Add a slice of beautiful tomato (preferably from the Farmer’s Market or at least organic.) Enjoy with or without a pickle.  It is so good!  It’s sweet and hot with the yummy nuttiness from the sesame seeds.  Oh my goodness!

Cynthia's Favorite Sandwich

Cynthia’s Favorite Sandwich


Do you make your own tahini?  Would you try it now that you know how easy and cheap it is?  Leave me a reply.  I would love to hear from you.

Many blessings,

Cynthia

Please follow me on Twitter.  Also, please LIKE my Facebook Page.

justdragonfly

Naturally Nutritious: Beet Greens and a Smoothie Recipe

One of the nicest things about shopping at the farmer’s market is that you see the produce in its natural state. There is no way you could transport beets and other root vegetables with the greens still intact. They would rot over the thousands of miles it takes for them to be delivered. Heaven forbid should there still be any soil on a fruit or veggie in the supermarket! By the time we see them, they are the de-stemmed, triple-washed, gleaming, little, over-sanitized specimens, we expect them to be. You’d never guess that they had been grown in dirt.

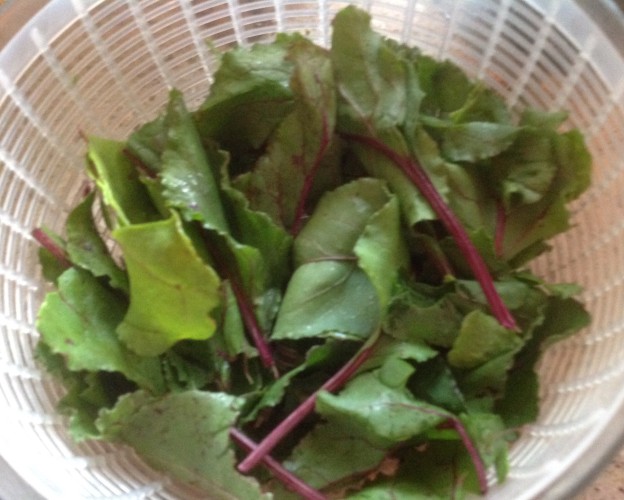
Unfortunately, we miss out on the greens. Beet greens, like all greens, are high in fiber. They also contain significant amounts of vitamins K, C and A. Best of all, they are tasty! Some people find them bitter. I honestly don’t. Compared to kale, they are almost sweet… but not quite. I would say they have a fresh, green, earthy flavor. Beet greens are excellent sautéed. They can be added to soups and stews or served raw in salad. I enjoy adding beet greens to my autumn smoothies.

image

Autumn Apple and Beet Green Smoothie

One Cup of Almond Milk

One Apple (cored and cut in a few pieces)

Handful of Beet Greens

Handful of Kale

One Banana

A few drops of lemon juice

Two Tablespoons of Chia Seeds

Throw all the ingredients in a blender. Blend until smooth. Drink immediately. (I have begun to add the chia seeds after I pour it into a glass. Little suckers get stuck to the side of the blender if you aren’t careful!)

Do you eat the greens that come with your root vegetables? Would you? Please leave me a reply. I would love to hear from you.

Many Blessings,

Cynthia

Please follow me on Twitter.  Also, please LIKE my Facebook Page.

justdragonfly